The reconstruction project
The reconstruction that follows is a consequence of what discussed in previous presentation. Used material is textile (linen and wool/felt) and the colours are brilliant as the traces found on the original statues.
Let me remove any doubt: this reconstruction cannot be considered "experimental archeology" because in each step of the process I have used modern tools and materials (needles, linen, colorants, etc.) and I have avoided any metodology or protocol of this science.
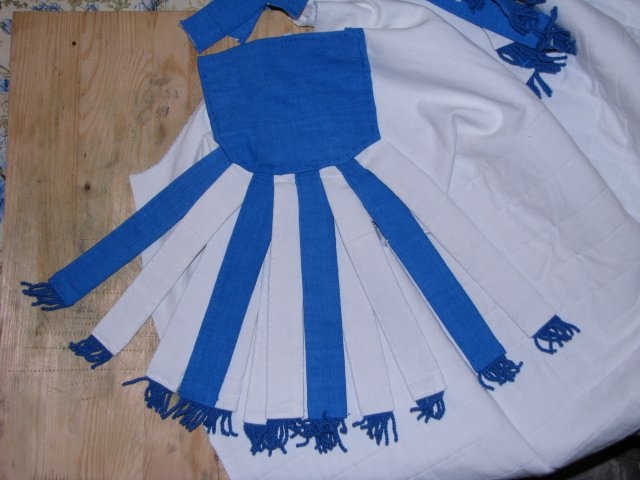
In the lower part, that we we could name "kilt", I have planned to make two different lines of pteruges. The most external one on the top I chose the aegyptian blu colour, while the longer row, under the first one, the colour is white, but with blu fringes. Each row has a separate linen belt in order to be able to wash them separately.
In the higher part (the shoulders) there will be also two rows for each shoulder. The bottom one completely white with blue fringes, the top one with alternate blu-white pteryges always with blue fringes.
|
|


Pic.12-13. Left: pteruges layout as discussed in origin. The brown section is felt, red is the linen, while the fringes are blue.
Right: sewings on the two versions with or without fringes.
|
Colouring
The linen used is very old. I used an "ancient" sheet of the XIX century (from the grand-mother of my grand-mother) probably hand made. I made this terrible decision to sacrify that sheet because I was fascinated from the linen irregularity with the hand made junctions much evident.
The linen was completely white due to high usage and my project previewed coloring according to the color in use within our reencter group: the aegyptian blue. So I used a machine-wash powder from Dylon.
|
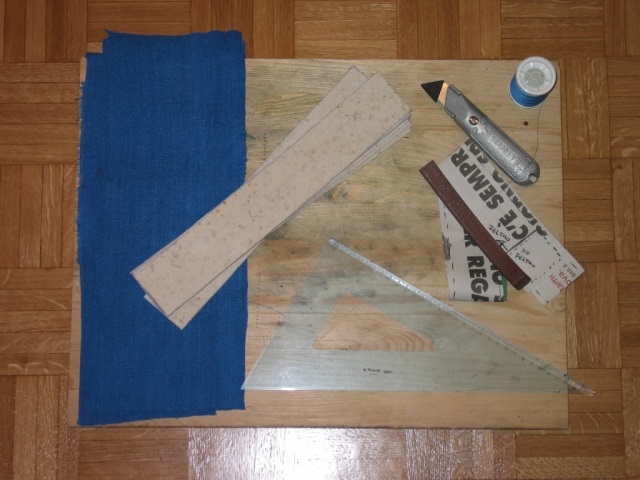
Cutting
Once decided the lenght of each row it must be cut the 1mm thick felt with a tolerance of 1-2mm on each side. The linen require much more tolerance of about 10mm on each side because it is needed for the hems, while on the top it is needed to leave 70-80mm of free linen to be sewed to the belt. For this reason it has to be left without felt.
|
|

Pic.14-15. The pile of cut felt pieces and the work plank. The cut has been done with a normal cutter.
|
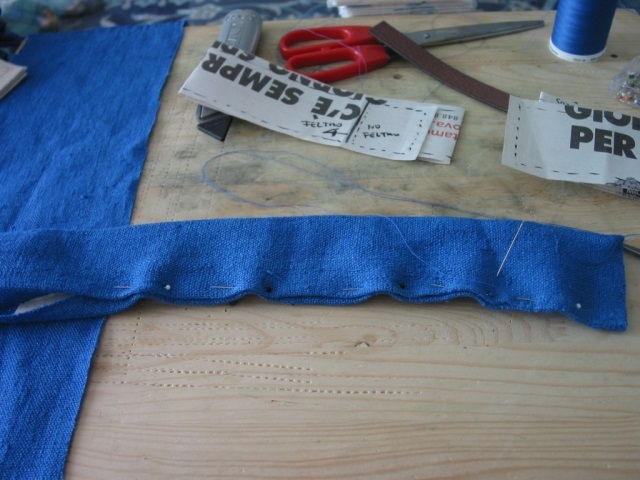
Sewing the "sandwich"
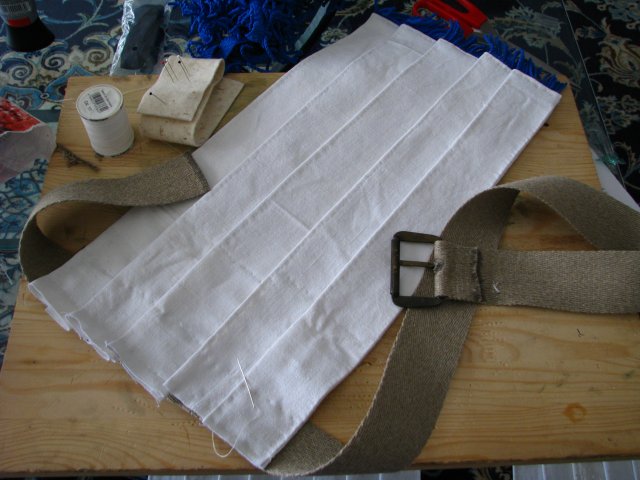
Before to start sewing let me remember to non experts the extremely importance to assemble the pieces togheter in advance with some pins. In the pictures below (pic. 16) is visible on the left side of the pteryge the free linen without felt to facilitate the belt sewing. In this case I have chosen to leave a longer piece in order to attach the pteruge in the internal side of the belt. This way the pteruge must be turned above the belt once weared.
|
|

Pic.16-17. Left: while placing the pins. Right: starting sewing with pins placed.
|
|
The sewing over the hem is much easy: the needle must pass always in same sense not in alternance a sort of spiral.
|
|

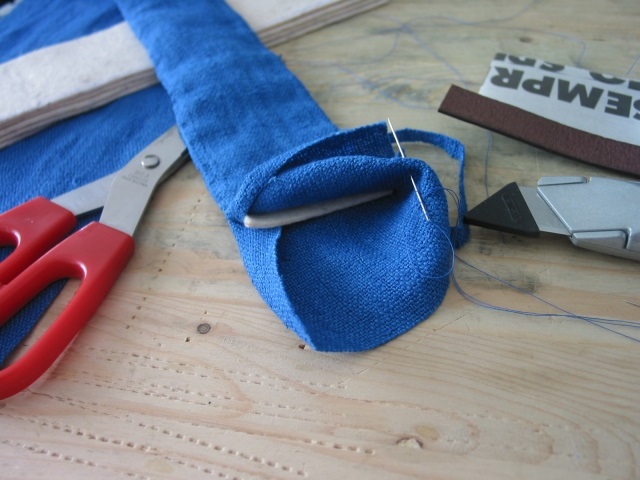
Pic.18-19. Left: the "spiral" sewing. Right: the terminal part not finished.
|
Fringes
The second row of pteruges, the longer one, is white in order to create more contrast with the blue row. This row is with fringes in the terminal part.
The final assembly is done attaching the pteruges to a thick linen belt.
|
|
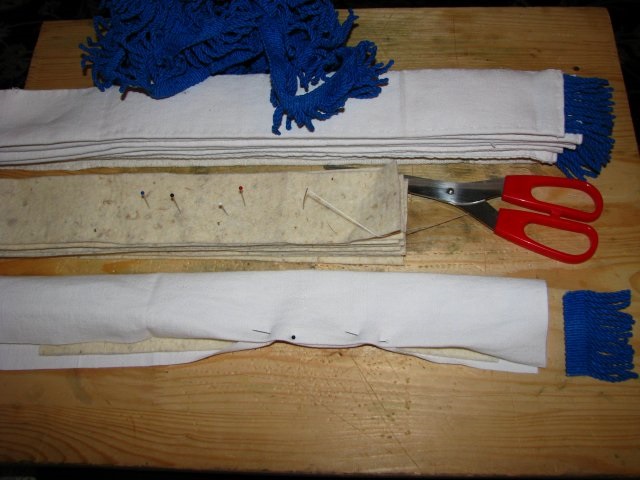
Pic.20-21. Left: sewing the white pteryges with the fringe.
Right: final assembly on the linen belt.
|
The final assembly
I chose to install the two rows of pteryges on two different belts instead of attach them directly on the subarmalis for many reasons. One, as it has been already discussed, is about maintenance but there are some other for similar practical reasons.
As example belts this way can be resized easily. It happens always to me to loose weight from one day to the other because reenactment is sometime hard.
Another important reason is that this way pteruges are more versatile. In fact I could decide to mount them "over" the lorica as visible in the famous Pretorian Relief hoted in the Louvre Museum. (pic.23).
|
|

Pic.22. Dressing the "kilt" of pteruges.
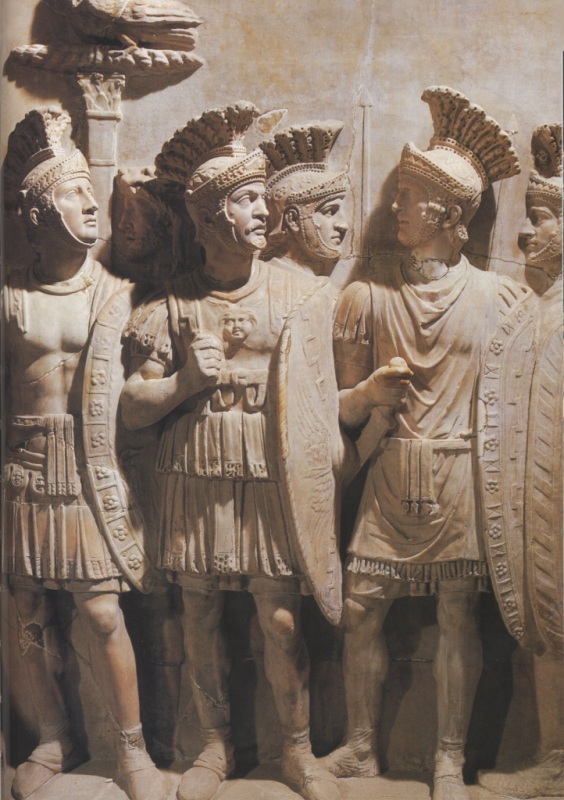
Pic.23. The Pretorian Relief at the Louvre Museum (Paris, France).
|
Shoulders
Once completed the two "belts" of pteruges it's time to start working on the shoulders and to create a subarmalis.
I have chosen to make pteruges as part of the subarmalis, in a way that they will be effectively useful to add thickness for the armour.
First step is to create a "gilet" made with the usual sandwich with the core made of felt 1 mm thick, and the linen on both sides. In this case I have chosen to sew felt just from the nipples to the belt because my intention was to use pteruges on the shoulders to protect them not only to the heavy armour, but also from the sun when the armour became very hot under the sun.
Once done the gilet pteryges must be done in the usual way, but with different sizes. My choice was to build also on the shoulders two different rows of them: the first more hidden counts 5 white ptryges, while the second above composed of 8 pteryges alternatively coloured of white and blue. Both rows with fringes.
The most difficult step is to attach them on the gilet. It is an hard work because it is requested strongness in the fingers while passing trough 2-3 centimeters of variuos material, but overall pteryges must be "in line"! And, pay attention to make the same and the right and on the left shoulders. It happened to me many many times to attach and remove them because sewn in the wrong position.
|
|


Pic.24-25. Left: while sewing the first 5 white pteryges. On the right the very difficult sewing of the 8 white and blue pteruges.
|
|
Once finished it's time to work on the look. I decided to cover the shoulder by adding some more felt pieces and fixing them with a big blue piece of linen. Once done, I was really proud of the look and I was impressed about my theory about the epaulette (pic. 3d).
|
|

Pic.26-27. Two sights of the final result applying the additional felt to enlarge the shoulder covering.
|
|
At this time the most is done and we need some fantasy to complete some details as the blue border and the laces.
|
|


Pic.28-29. The final result. On the right completed with the two belts of pteruges.
|
|

Pic.30. With the lorica squamata armour.
|