![]()
![]()
![]()
![]()
![]()

How to build the scutum cover


We know many things about the roman soldier equipment while on campaign, but the current knowledge cannot definitely assure if a soldier had a true standard list of objects to carry on. This supposed list was likely varying or decided by the commanders from time to time according with the situation.
Anyway, one of the common objects in the marching set is the scutisque tegimenta, a big cover for the roman shield made in leather.
Also the literature reports some traces of this cover.
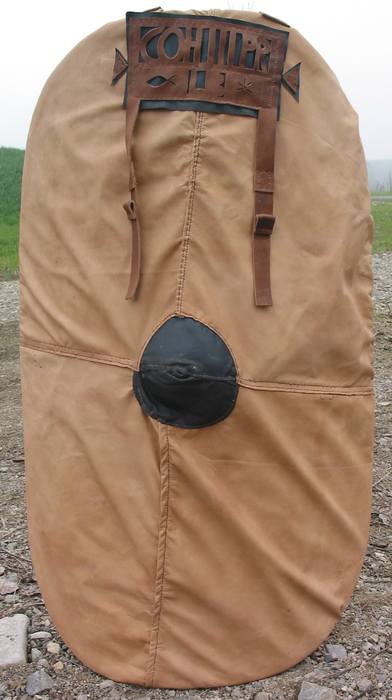
Pic.1. An example of tegimentum
We can only speculate about why the romans were taking big care of their shields, suggestions are brought from the reenacting experience.
First of all we must remember that the shield, together with the standards, was a key object that was used to identify soldiers as member of each group (cohors or centuriae), this means that the scutum would always be kept perfectly clean and with bright colours. By not using the cover, in fact, the shield is exposed not only to dust, obviously, bat also to mud, rain and, overall, the sun. Sun can be the worst enemy for the shield and can cause the fading of the precius colour and the leather/wood to dry.
Rain, can make the opposite by "inflatening" of humidity the woodcore.

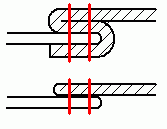
Pic.2. One of the goat hides. Pic.3. Top: the waterproof four layers sewing. Bottom: the simple two layers sewing with double stitching (red).
How to build it
The shield cover on this page has been done considering some of the evidences such Castleford's ones. The leather used is the very thin (less than 1mm) and soft goatskin.
In total 4 complete goat hides were used for my scutum (100x60cm), the total cost has been 40 euros (in 2006).
The biggest problem faced was about sewings that should be waterproof in my intentions.
First I defined a "top" and a "bottom" in order to overlap the skin layers to avoid water to flew in.
The vertical sewings required a long and patient work because I choosed to make a 4 layers sewing as in pic.3. I don't know if this kind of sewing has some archeologic evidence, but I thought this way would be the best for waterproofing my cover. Anyway similar sewings, some times even much more complicated, has been found in many excavations, overall on tent pieces.
To stich I used the punch in pic.4 with a small hammer. The result, regarding the four layers stich is on pic.5. The distance from each stich is a bit less than 3mm.


From the left: pic.4 the tools used; pic.5 the stiched skin.


From the left: pic.6 while sewing with two awls; pic.7 detail of the four layers sewing.
A different blue leather has been used on the umbo just for aesthetics.
Please note the sewings around the circle consider the "top-bottom" criteria in order to facilitate the rain to flow down.
Next to the the four knots an additional heavy leather piece was necessary to make the cover stronger. In fact at the first attempt to use it on the shield I made a 3cm hole in the skin.


From the left: pic.8 umbo detail; pic.9 detail of the strong leather reinforcement.
To hold the cover when not used I had the idea to use the system illustrated that is probably not philologic, but it is a simple and effective way to solve this issue avoiding heavy metal buckles or "flying" laces.

Pic.10. The layout of the strap holder with no buckles.

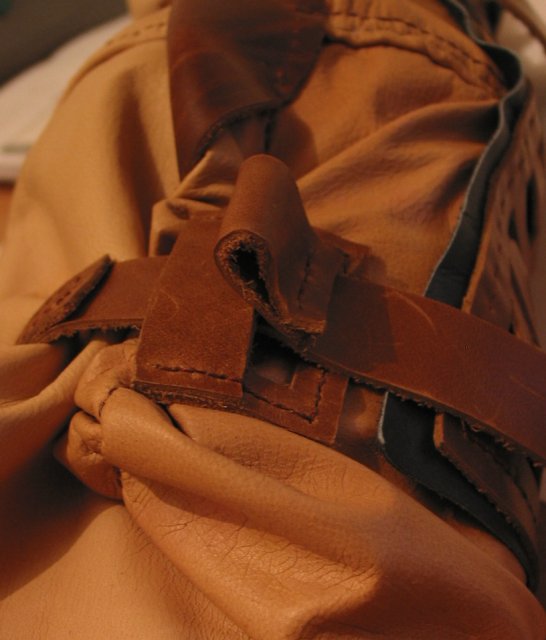
From the left: pic.11 the fastens on the straps; pic.12 fasten closeup;
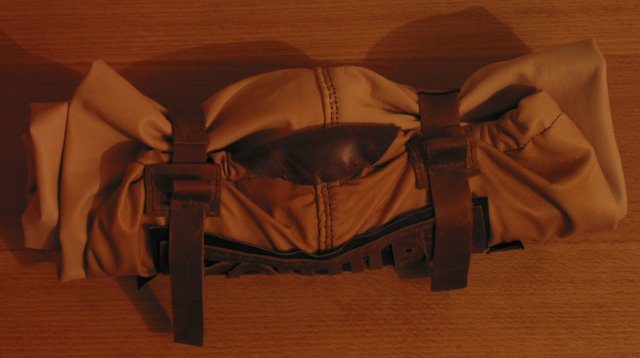
pic.13 the total view of the cover fastened up.
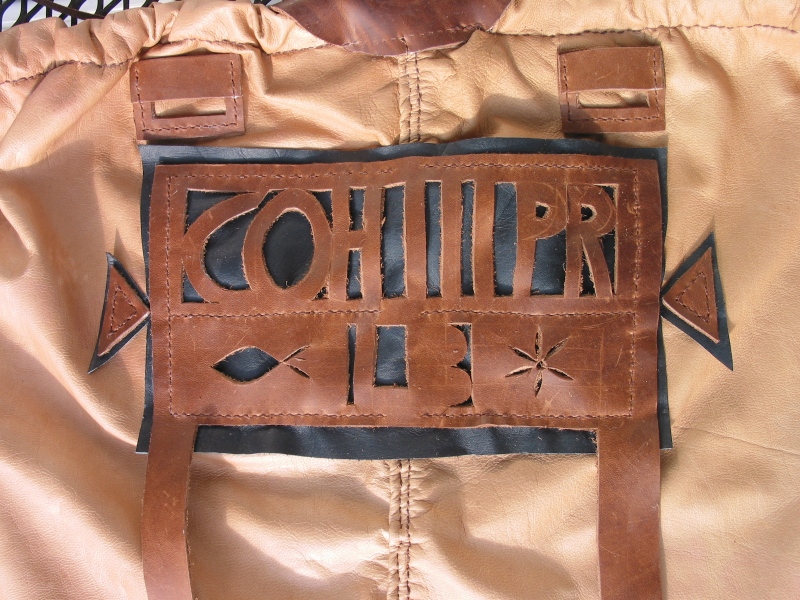

From the left: pic.14 decoration with letters and motifs; pic.15 mink oil application.
It is very useful to apply a written decoration on all the carrying equipment in order to better identify the owner. In my example I have inserted evocative or possibly magic symbols (a fish and a star) according to my preferences.
Once terminated the sewings I have applied a huge layer of mink oil in order to make the skin softer and more waterproof. This will make the skin also much less exposed to rain tears.
I used mink oil, but any kind of oil can be used, also vegetal ones, but with the risk of stinks.
It is better to oil the cover periodically to avoit to get it too dry.
The making of the tegimentum in the way I have presented in these pages requires
a very long time. Particularly the four layers sewing required big attention and patience because of the great amount of stiches.
Just the vertical sewing rquired about 7 hours. The complete cover required 35 hours of work.
By the experience done I suggest to use stiches of 5-6mm distance between them different from mines (3mm), this will reduce the total time for at least 30-40%. In addition I suggest to those who "don't have time to waste", to forget the four layers sewing because also the normal two layers is perfectly waterproof when oiled.
External links
Notes
1 - Caius Iulius Caesar - De Bello Gallico (2,21)
Temporis tanta fuit exiguitas hostiumque tam paratus ad dimicandum animus ut non modo ad
insignia accommodanda sed etiam ad galeas induendas scutisque tegimenta detrahenda tempus defuerit.
2 - Plutarch - Lucullus (27,5)
(C) 1996-2026 Luca Bonacina